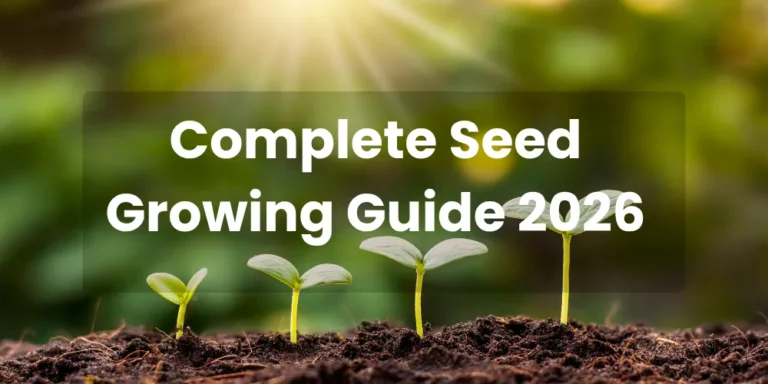
How long do tomato seeds take to grow?
wondering how long do tomato seeds take to grow? Growing your own food is a rewarding journey for homeowners. Learn the timeline and get the best indoor tips to succeed. Watching a tiny seed transform into a heavy vine of juicy red fruit brings incredible joy. Many people in the U.S. are changing their backyards. They are making them into edible gardens. However, beginner gardeners often wonder about the exact timeline of this natural process. You might look at your small soil pots daily and feel a little impatient.
If you want to know how long do tomato seeds take to grow, you are in the perfect place. Usually, these seeds take about 5 to 10 days to pop through the soil. After sprouting, they spend several weeks growing into strong, leafy seedlings. This entire process depends heavily on warm temperatures, proper moisture, and bright light. In this complete guide, we will break down the entire timeline from a tiny seed to a hardy plant.
As a home fix-it guy in New York, I always look for smart ways to improve living spaces. I’m Archie M. Guerrero. I help homeowners design lovely gardens. I’ve done this for years. I have built custom raised beds from Queens to Long Island. I know that successful indoor seed starting requires a bit of attention to detail. Getting seeds to sprout is like fixing a door frame. You need the right environment. It’s essential for success.
This detailed guide will cover everything you need to build your dream garden. We will discuss soil choices, warming tricks, lighting setups, and common mistakes. This article is a proud part of our website’s main pillar post: Complete Seed Growing Guide. Learn the basics. This helps you avoid mistakes. You’ll have a great summer harvest! Let us dive into the wonderful world of seed starting.
Key Takeaways:
- Tomato seeds generally take 5 to 10 days to sprout under ideal warm conditions.
- Soil temperatures of 70°F to 80°F make seeds sprout faster. Keeping it in this range helps germination a lot.
- A good seed mix stops root diseases. It also helps young sprouts grow.
- Young tomato seedlings need 14 to 16 hours of bright light daily to prevent leggy growth.
- Knowing exactly how long do tomato seeds take to grow helps you plan a perfect spring garden.
expert tricks to speed up your backyard harvest today.
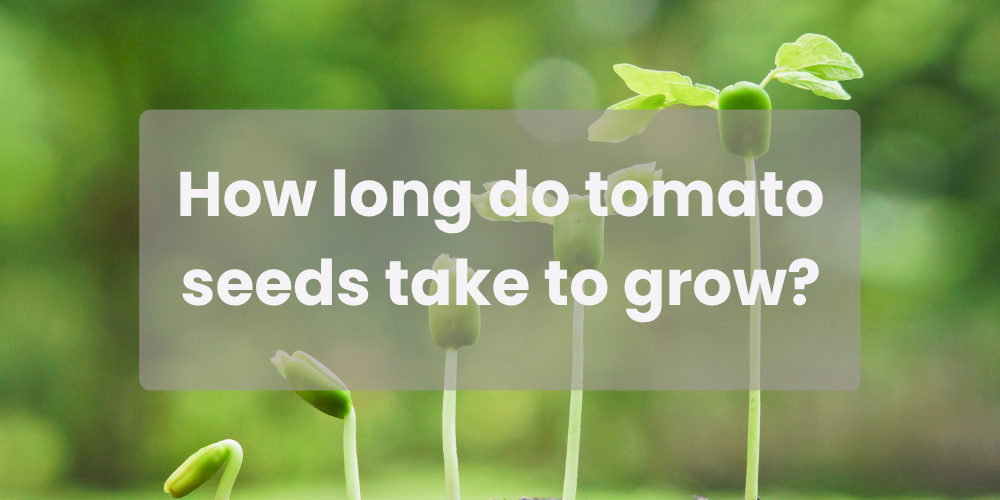
How long do tomato seeds take to grow?
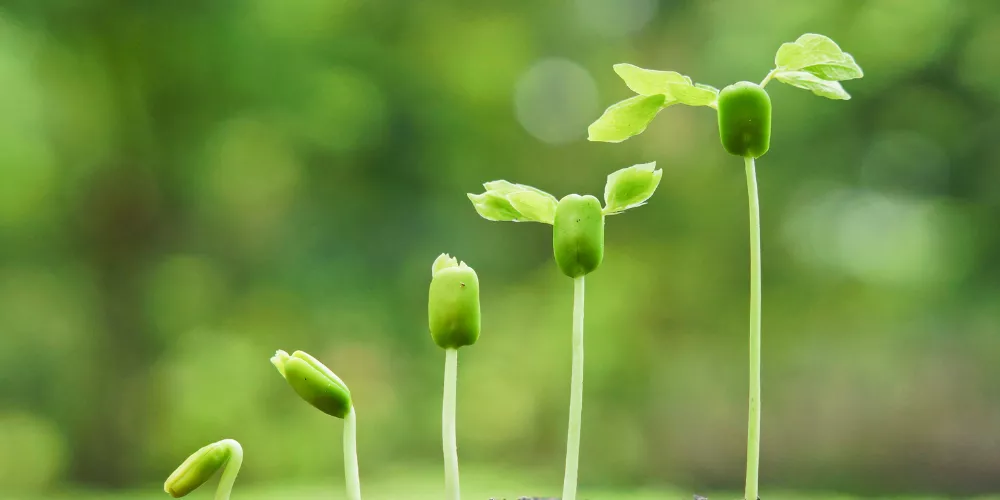
Starting a garden needs patience. It also requires good timing and a simple understanding of plants. Generally, a tomato seed needs 5 to 10 days to germinate when conditions are ideal. The USDA says tomatoes are the top crop in U.S. gardens. Many people grow them. Millions of American households plant them every single spring season. Knowing the growth timeline helps you avoid wasting money on failed crops. Let us look at the detailed stages of this rewarding journey.
Incredible Basics: Understanding How Long Do Tomato Seeds Take to Grow
The journey of a tiny seed into a vibrant plant is truly amazing. Many beginner gardeners ask me how long do tomato seeds take to grow before buying supplies. In most cases, you will see green loops breaking through the soil within a week. However, poor soil conditions can stretch this timeline to 14 days or longer. It is important to realize that the clock starts the moment moisture hits the seed coat.
For example, a homeowner in upstate New York might plant seeds in early March. If the room is chilly, those seeds will sit dormant for weeks. I always tell my clients that patience is a vital tool in home decoration and gardening. You cannot rush nature, but you can definitely give it the perfect environment to thrive.
Knowing the timeline helps you stick with your crops longer. Many people throw away perfectly good soil because they do not see sprouts in three days. Give your seeds at least two full weeks before assuming they are dead.
- Days 1 to 3: The seed absorbs water and swells inside the dark soil.
- Days 5 to 7: The tiny root bursts out and pushes downward for stability.
- Days 8 to 10: The green stem emerges above the surface to find light.
- Days 11+: The first true leaves expand and begin making food.
Older seeds grow slow. Fresh seeds grow fast, says Cornell University. Always check the expiration date on your seed packets before planting them. Try this today and see the difference a week can make for your garden!
In the next section, we will discuss the physical items you need to buy for success.
Essential Tools: Selecting the Best Potting Mix and Seed Starting Tray
To give your garden the best start, you must choose your materials wisely. Do not just grab random dirt from your backyard patio area. Raw backyard soil is often too heavy and contains harmful pests or weed seeds. Instead, head to your local The Home Depot store and buy a dedicated bag of potting mix. This specialized blend is light, fluffy, and sterile, which keeps young roots safe.
A sturdy seed starting tray is another essential item for your indoor garden setup. These trays hold soil plugs. They organize your plants. They also make moving them easy. I really love these trays. They fit perfectly on windowsills. They also work well on small utility shelves. They maximize your indoor space while keeping the mess completely contained.
- Peat Moss: Holds moisture well so your seeds never dry out completely.
- Perlite: White volcanic rock pieces that create tiny air pockets in soil.
- Vermiculite: Helps the soil retain vital nutrients for growing roots.
- Plastic Domes: Clear covers that trap humidity like a mini greenhouse.
The National Gardening Association did a study. Sterile mixes help seedlings. They reduce deaths by 40%. Investing a few dollars in good supplies saves you a lot of frustration later. Try this today and see the difference high-quality soil makes!
Now that you have your tools, let us look at the importance of warmth.
Proven Temperature Tricks: Speeding Up Tomato Seed Germination
Warmth is the ultimate secret trigger that tells a seed it is time to wake up. If you want to optimize how long do tomato seeds take to grow, manage your room temperature. Tomato plants love heat. They grow best in warm places. They originally come from tropical areas in South America. If your soil is below 60°F, your seeds will simply sleep in the mud.
I once helped a client in a drafty Brooklyn brownstone who could not get seeds to sprout. We placed a electric seedling heat mat under her tray, and sprouts appeared in four days! This simple fix showed how critical ambient temperature is for early plant development.
- Ideal Range: Keep the soil between 70°F and 80°F for maximum speed.
- Heat Mats: Cheap electronic mats provide continuous warmth from the bottom up.
- Location: Avoid placing your trays near drafty windows or cold AC vents.
- Monitoring: Use a small soil thermometer to check the temperature daily.
Iowa State University says tomato seeds need at least 65°F to grow. Warmth helps them start strong. It also helps them grow evenly. Try this today and see the difference a little heat makes!
Next, we will talk about how to water these delicate little sprouts.
Secret Watering Strategies: Nurturing Fragile Seedling Development
Watering your plants looks easy, but it requires a very gentle touch. Too much water drowns the roots and causes a deadly disease called damping-off. Too little water causes the tender seedling development process to stop completely. The goal is to keep the potting mix damp, like a well-wrung kitchen sponge.
When I do home repairs, I always emphasize using the right amount of pressure for tasks. The same rule applies to watering delicate little green sprouts in your home. Never pour water directly from a heavy bucket onto your tiny plants.
- Misting Bottles: Use a fine mist spray bottle for the first two weeks.
- Bottom Watering: Pour water into the bottom tray so soil absorbs it upward.
- Water Quality: Use room-temperature water to avoid shocking the sensitive roots.
- Drainage Check: Ensure your containers have holes so excess water escapes easily.
Overwatering kills indoor seedlings. The University of California says it’s the main problem. Keeping the moisture balanced protects your hard work from rotting away. Try this today and see the difference proper moisture makes!
Let us move on to the bright light requirements for your young plants.
Suggested image: A hand using a blue plastic spray bottle to mist tiny green seedlings. Image alt text: A person using a fine mist spray bottle to water young green seedlings.
Brilliant Lighting Solutions: Successful Growing Tomatoes Indoors
Once your sprouts appear, they instantly start looking for bright overhead sunlight. If you are growing tomatoes indoors, a standard home window is usually not bright enough. Without enough light, the stems grow tall, thin, and weak as they stretch toward glass panes. These weak plants will eventually tip over and die from exhaustion.
To fix this, I recommend buying a simple LED shop light from a trusted brand like Burpee Seeds. Hang the light just a few inches above the tops of your green plants. As the plants grow taller, raise the light fixture up to maintain the proper distance.
- Duration: Keep your indoor grow lights turned on for 14 to 16 hours daily.
- Distance: Position fluorescent or LED bulbs 3 to 4 inches above the leaves.
- Timers: Use an automatic wall timer so you never forget to flip the switch.
- Darkness: Give plants at least 8 hours of darkness so they can rest properly.
The American Horticultural Society says that lights help stems grow stronger. They grow better than on average windowsills. Giving them enough energy creates strong stocky bushes ready for the outdoors. Try this today and see the difference proper lighting makes!
Let us look at how to solve common problems if things go wrong.
Simple Troubleshooting Tactics: Fixing Sluggish Seed Sprouting
Sometimes, despite your best efforts, your garden project might hit a sudden roadblock. You might notice that weeks have passed without a single green leaf appearing. Do not panic or throw your supplies into the trash bin immediately. Most seed issues come down to simple environmental factors that you can fix easily.
During my repair jobs in downtown Manhattan, I always look for the root cause of a problem first. If your seeds are not waking up, check the moisture and temperature levels right away. Low-quality seeds or old inventory can also slow down your expected garden timeline.
- Check Moisture: Dig up one seed gently to see if it is bone dry or mushy.
- Boost Heat: Move the tray to a warmer room or on top of your refrigerator.
- Damping-Off: If stems turn mushy at the soil line, discard them immediately.
- Mold Growth: Remove the clear plastic humidity dome if white fuzz appears on soil.
Ohio State University Extension says bad seed storage lowers germination rates. It can reduce them by half. Always store your leftover packets in a cool, dry, and dark closet. Try this today and see the difference a quick fix can make!
Finally, let us learn how to safely move your plants out into the open air.
Expert Transplanting Methods: Moving Your New Plants Outside
The final step of the indoor journey is moving your beautiful plants into the open backyard. You cannot just take them from a cozy room and put them in hot bright sunlight. The outdoor wind, sun, and temperature changes will shock and kill your tender crops. You must use a slow process called hardening off to get them ready.
I tell my New York clients that transitioning plants is like acclimating to a new home design. Take your trays outside for just one hour on the first day, keeping them in shade. Add more outdoor time each day for a week. Soon, they can enjoy full sunshine.
- Day 1 to 2: Place plants in a shaded, wind-protected spot for 60 minutes.
- Day 3 to 4: Allow them to sit in morning sunlight for 2 to 3 hours.
- Day 5 to 6: Leave them outside all day long but bring them inside at night.
- Day 7: Plant them deep into your garden beds after the last spring frost.
A Rutgers University report says hardened plants grow fruit faster. They can be ready up to two weeks earlier than non-hardened plants. Taking this extra step ensures all your hard work pays off with big rewards. Try this today and see the difference proper preparation makes!
Growing your own food is a deeply rewarding experience for any homeowner. Watching a tiny seed transform into a heavy vine of juicy red fruit brings incredible joy. Many people in the U.S. are changing their backyards. They are making them into edible gardens. However, beginner gardeners often wonder about the exact timeline of this natural process. You might look at your small soil pots daily and feel a little impatient.
If you want to know how long do tomato seeds take to grow, you are in the perfect place. Usually, these seeds take about 5 to 10 days to pop through the soil. After sprouting, they spend several weeks growing into strong, leafy seedlings. This entire process depends heavily on warm temperatures, proper moisture, and bright light. In this complete guide, we will break down the entire timeline from a tiny seed to a hardy plant.
As a home fix-it guy in New York, I always look for smart ways to improve living spaces. I’m Archie M. Guerrero. I help homeowners design beautiful gardens. I’ve been doing this for years. I have built custom raised beds from Queens to Long Island. I know that successful indoor seed starting requires a bit of attention to detail. Getting seeds to sprout is like fixing a broken door frame. You need the right environment.
This detailed guide will cover everything you need to build your dream garden. We will discuss soil choices, warming tricks, lighting setups, and common mistakes. This article is a proud part of our website’s main pillar post: Complete Seed Growing Guide. Learn the basics. This helps you avoid mistakes. You’ll enjoy a big summer harvest. Let us dive into the wonderful world of seed starting.
Incredible Basics: Understanding How Long Do Tomato Seeds Take to Grow
The journey of a tiny seed into a vibrant plant is truly amazing. Many beginner gardeners ask me how long do tomato seeds take to grow before buying supplies. In most cases, you will see green loops breaking through the soil within a week. However, poor soil conditions can stretch this timeline to 14 days or longer. It is important to realize that the clock starts the moment moisture hits the seed coat.
For example, a homeowner in upstate New York might plant seeds in early March. If the room is chilly, those seeds will sit dormant for weeks. I always tell my clients that patience is a vital tool in home decoration and gardening. You cannot rush nature, but you can definitely give it the perfect environment to thrive.
Knowing the initial timeline helps you stick with your crops. Don’t give up too soon! Many people throw away perfectly good soil because they do not see sprouts in three days. Give your seeds at least two full weeks before assuming they are dead.
- Days 1 to 3: The seed absorbs water and swells inside the dark soil.
- Days 5 to 7: The tiny root bursts out and pushes downward for stability.
- Days 8 to 10: The green stem emerges above the surface to find light.
- Days 11+: The first true leaves expand and begin making food.
Cornell University research shows that older seeds wake up more slowly. Fresh seeds sprout faster. Always check the expiration date on your seed packets before planting them. Try this today and see the difference a week can make for your garden!
In the next section, we will discuss the physical items you need to buy for success.
Essential Tools: Selecting the Best Potting Mix and Seed Starting Tray
To give your garden the best start, you must choose your materials wisely. Do not just grab random dirt from your backyard patio area. Raw backyard soil is often too heavy and contains harmful pests or weed seeds. Instead, head to your local The Home Depot store and buy a dedicated bag of potting mix. This specialized blend is light, fluffy, and sterile, which keeps young roots safe.
A sturdy seed starting tray is another essential item for your indoor garden setup. These trays hold soil plugs. They keep your plants neat. You can move them easily. I love these trays. They fit perfectly on windowsills or small shelves. They maximize your indoor space while keeping the mess completely contained.
- Peat Moss: Holds moisture well so your seeds never dry out completely.
- Perlite: White volcanic rock pieces that create tiny air pockets in soil.
- Vermiculite: Helps the soil retain vital nutrients for growing roots.
- Plastic Domes: Clear covers that trap humidity like a mini greenhouse.
A study from the National Gardening Association found that sterile mixes help. They lower seedling deaths. They cut it by 40%. Investing a few dollars in good supplies saves you a lot of frustration later. Try this today and see the difference high-quality soil makes!
Now that you have your tools, let us look at the importance of warmth.
Proven Temperature Tricks: Speeding Up Tomato Seed Germination
Warmth is the ultimate secret trigger that tells a seed it is time to wake up. If you want to optimize how long do tomato seeds take to grow, manage your room temperature. Tomato plants thrive in heat. They come from warm tropical areas in South America. If your soil is below 60°F, your seeds will simply sleep in the mud.
I once helped a client in a drafty Brooklyn brownstone who could not get seeds to sprout. We placed a electric seedling heat mat under her tray, and sprouts appeared in four days! This simple fix showed how critical ambient temperature is for early plant development.
- Ideal Range: Keep the soil between 70°F and 80°F for maximum speed.
- Heat Mats: Cheap electronic mats provide continuous warmth from the bottom up.
- Location: Avoid placing your trays near drafty windows or cold AC vents.
- Monitoring: Use a small soil thermometer to check the temperature daily.
The Extension service at Iowa State University says tomato seeds don’t grow well below 65°F. Keep them warm. This helps your plants grow fast and even. Try this today and see the difference a little heat makes!
Next, we will talk about how to water these delicate little sprouts.
Secret Watering Strategies: Nurturing Fragile Seedling Development
Watering your plants looks easy, but it requires a very gentle touch. Too much water drowns the roots and causes a deadly disease called damping-off. Too little water causes the tender seedling development process to stop completely. The goal is to keep the potting mix damp, like a well-wrung kitchen sponge.
When I do home repairs, I always emphasize using the right amount of pressure for tasks. The same rule applies to watering delicate little green sprouts in your home. Never pour water directly from a heavy bucket onto your tiny plants.
- Misting Bottles: Use a fine mist spray bottle for the first two weeks.
- Bottom Watering: Pour water into the bottom tray so soil absorbs it upward.
- Water Quality: Use room-temperature water to avoid shocking the sensitive roots.
- Drainage Check: Ensure your containers have holes so excess water escapes easily.
Data from the University of California Agriculture department says overwatering kills indoor seedlings. Too much water is bad for them. It is the main cause of death for them. Keeping the moisture balanced protects your hard work from rotting away. Try this today and see the difference proper moisture makes!
Let us move on to the bright light requirements for your young plants.
Brilliant Lighting Solutions: Successful Growing Tomatoes Indoors
Once your sprouts appear, they instantly start looking for bright overhead sunlight. If you are growing tomatoes indoors, a standard home window is usually not bright enough. Without enough light, the stems grow tall, thin, and weak as they stretch toward glass panes. These weak plants will eventually tip over and die from exhaustion.
To fix this, I recommend buying a simple LED shop light from a trusted brand like Burpee Seeds. Hang the light just a few inches above the tops of your green plants. As the plants grow taller, raise the light fixture up to maintain the proper distance.
- Duration: Keep your indoor grow lights turned on for 14 to 16 hours daily.
- Distance: Position fluorescent or LED bulbs 3 to 4 inches above the leaves.
- Timers: Use an automatic wall timer so you never forget to flip the switch.
- Darkness: Give plants at least 8 hours of darkness so they can rest properly.
The American Horticultural Society says artificial lights make stems stronger. They are better than normal windows. Giving them enough energy creates strong stocky bushes ready for the outdoors. Try this today and see the difference proper lighting makes!
Let us look at how to solve common problems if things go wrong.
Bright LED grow lights hang over rows of lush green tomato plants.
Image alt text: LED grow lights shine over healthy tomato seedlings. They grow indoors.
Simple Troubleshooting Tactics: Fixing Sluggish Seed Sprouting
Sometimes, despite your best efforts, your garden project might hit a sudden roadblock. You might notice that weeks have passed without a single green leaf appearing. Do not panic or throw your supplies into the trash bin immediately. Most seed issues come down to simple environmental factors that you can fix easily.
During my repair jobs in downtown Manhattan, I always look for the root cause of a problem first. If your seeds are not waking up, check the moisture and temperature levels right away. Low-quality seeds or old inventory can also slow down your expected garden timeline.
- Check Moisture: Dig up one seed gently to see if it is bone dry or mushy.
- Boost Heat: Move the tray to a warmer room or on top of your refrigerator.
- Damping-Off: If stems turn mushy at the soil line, discard them immediately.
- Mold Growth: Remove the clear plastic humidity dome if white fuzz appears on soil.
Poor seed storage reduces germination rates. In fact, it can cut them in half. This comes from statistics by the Ohio State University Extension. Always store your leftover packets in a cool, dry, and dark closet. Try this today and see the difference a quick fix can make!
Finally, let us learn how to safely move your plants out into the open air.
Expert Transplanting Methods: Moving Your New Plants Outside
The final step of the indoor journey is moving your beautiful plants into the open backyard. You cannot just take them from a cozy room and put them in hot bright sunlight. The outdoor wind, sun, and temperature changes will shock and kill your tender crops. You must use a slow process called hardening off to get them ready.
I tell my New York clients that transitioning plants is like acclimating to a new home design. Take your trays outside for just one hour on the first day, keeping them in shade. Increase their outdoor time each day for a week. Aim for full sunshine by the end.
- Day 1 to 2: Place plants in a shaded, wind-protected spot for 60 minutes.
- Day 3 to 4: Allow them to sit in morning sunlight for 2 to 3 hours.
- Day 5 to 6: Leave them outside all day long but bring them inside at night.
- Day 7: Plant them deep into your garden beds after the last spring frost.
A report from Rutgers University shows that hardened plants produce fruit. They do this up to two weeks earlier than non-hardened plants. Taking this extra step ensures all your hard work pays off with big rewards. Try this today and see the difference proper preparation makes!
Quick Summary:
Growing tomatoes from seeds is a fun and rewarding project for homeowners. It’s simple, too! By managing heat, light, and water, you can watch healthy green sprouts appear in less than a week. Avoid common mistakes, such as using heavy backyard dirt. Also, be careful not to overwater your delicate new trays. With the right tools and some patience, your indoor seeds can grow into a big summer harvest.
Key Points Covered:
- Tomato seeds take 5 to 10 days to germinate in warm, damp soil.
- Using a sterile potting mix prevents diseases and protects delicate root structures.
- Soil temperatures between 70°F and 80°F drastically speed up the sprouting process.
- Artificial grow lights prevent seedlings from becoming tall, thin, and weak.
- Hardening off plants for one week ensures survival when moving them outside.
Frequently Asked Questions
Have a few lingering questions about your seeds? Don’t worry—getting a bit anxious while watching small pots of soil is completely normal. Just like troubleshooting a tricky home repair project, getting the right answers early saves you a ton of frustration down the road. Below are the most common questions I get from fellow homeowners about dialing in the perfect tomato timeline.
How can I make my tomato seeds sprout much faster?
For faster results, use an electric seedling mat for steady bottom heat. Keep the soil mix moist but not soggy, and cover the tray with a clear plastic dome. These steps create a warm, humid environment that mimics a tropical climate. Under these ideal conditions, you will notice a huge change in how long do tomato seeds take to grow. Most fresh seeds will pop up within 5 days when kept at a stable 75°F.
Why are my indoor tomato seedlings growing so tall and thin?
Your plants are tall and thin. They need more bright overhead light. This common condition is called leggy growth, and it creates weak, useless stems. To fix this, place a bright LED grow light just a few inches above the green leaves. Leave the light on for 14 to 16 hours every day to give them energy. Giving your plants enough light helps them grow strong and stocky. Otherwise, they might stretch out.
How long do tomato seeds take to grow into full plants?
It takes about 60 to 80 days after transplanting for a seed to produce mature fruit. The initial indoor germination phase takes roughly 5 to 10 days to complete. The young plants grow indoors for about 6 weeks. Then, they move to the backyard. Total time from planting a seed to eating a ripe tomato is usually 3 to 4 months. The exact timeline depends on the specific variety you choose to plant.
Can I plant fresh seeds directly from a grocery store tomato?
Yes, you can use fresh seeds, but you must clean and ferment them first to remove the jelly coat. This gel coat has natural chemicals. They stop the seed from sprouting inside the fruit. Wash the seeds thoroughly, let them dry on a paper towel, and plant them in fresh mix. Grocery store tomatoes are often hybrids. So, the new plants might look different.
How deeply should I bury tomato seeds in the potting mix?
You should bury your seeds roughly one-quarter of an inch deep into the fluffy soil. If you plant them too deeply, the tiny sprout will run out of energy before hitting sunlight. If you plant them too shallowly, the roots will not anchor properly into the ground. Gently press the soil down over the seed and mist it with water to settle the mix. This depth optimizes how long do tomato seeds take to grow successfully.
Conclusion
Starting a home garden is one of the best ways to upgrade your outdoor living space. In this article, we covered the timeline for starting backyard crops. We also listed the steps you need to take. We learned that the answer to how long do tomato seeds take to grow is usually 5 to 10 days. Control the temperature. Use sterile soil. Provide bright light. This will guarantee your success.
For a great harvest, keep these three tips in mind for your next project. First, always use a dedicated electric heat mat to keep your soil warm and cozy. Second, hang a bright LED light close to your plants to build strong, thick green stems. Third, take a full week to help your plants adjust to the outdoor weather before you dig holes.
Think about a homeowner in New York City turning a small concrete patio into a lush green oasis. With just a few cheap plastic trays and good seeds, they can grow pounds of fresh food. Archie M. Guerrero here. Great home projects need patience and attention to detail. You do not need a massive farm to enjoy the taste of homegrown summer vegetables.
Now it is time to get your hands dirty and start your own gardening journey. Head to your local garden center, grab your favorite seeds, and set up your trays today. Do not let the spring season pass you by without starting this fun home project. Please share your favorite tomato types. You can also ask any questions in the comments below! Bookm